How to Set Up Your Digital Signage Network with SignageFlow: A Step-by-Step Guide
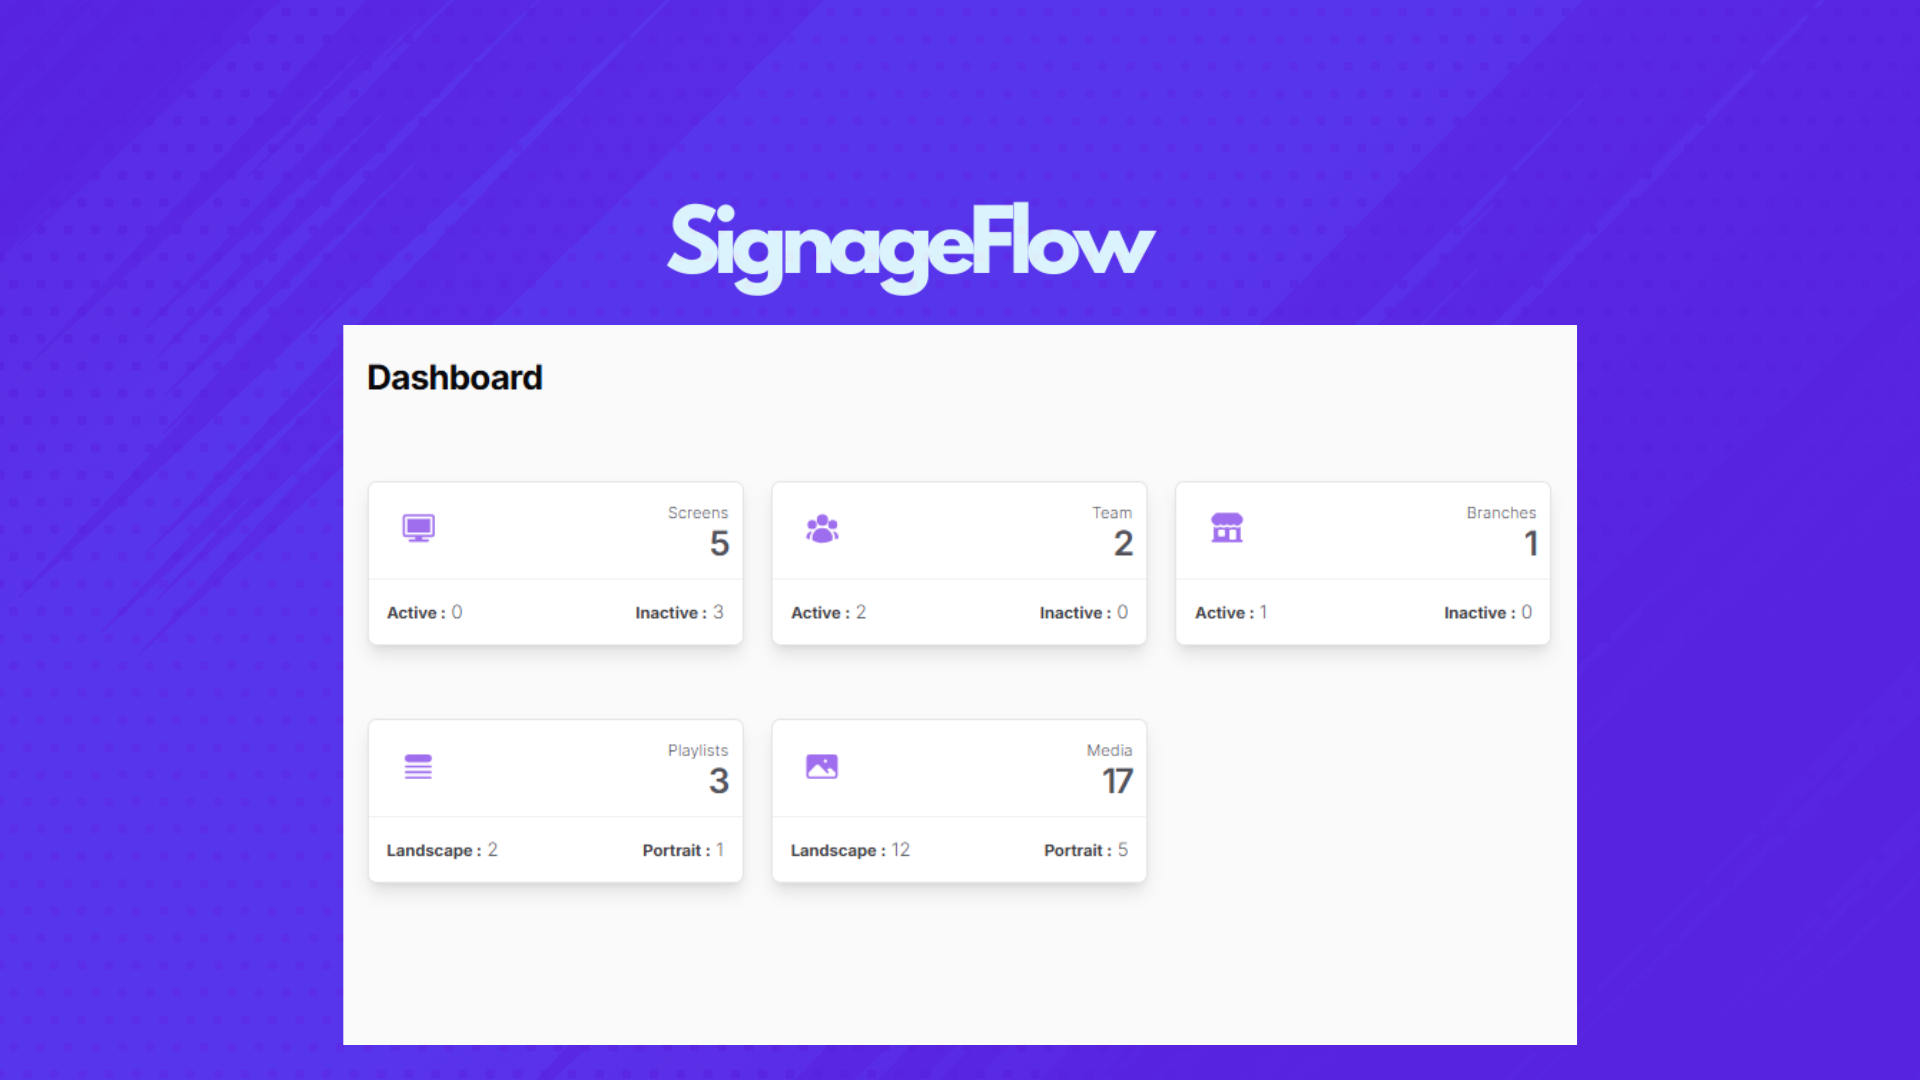
Welcome to SignageFlow! This guide will walk you through the essential steps to get your digital signage network up and running, from organizing your locations to displaying your content. We'll cover creating branches, uploading media, building playlists, linking screens, and using advanced features like screen zones and tags for simplified management.
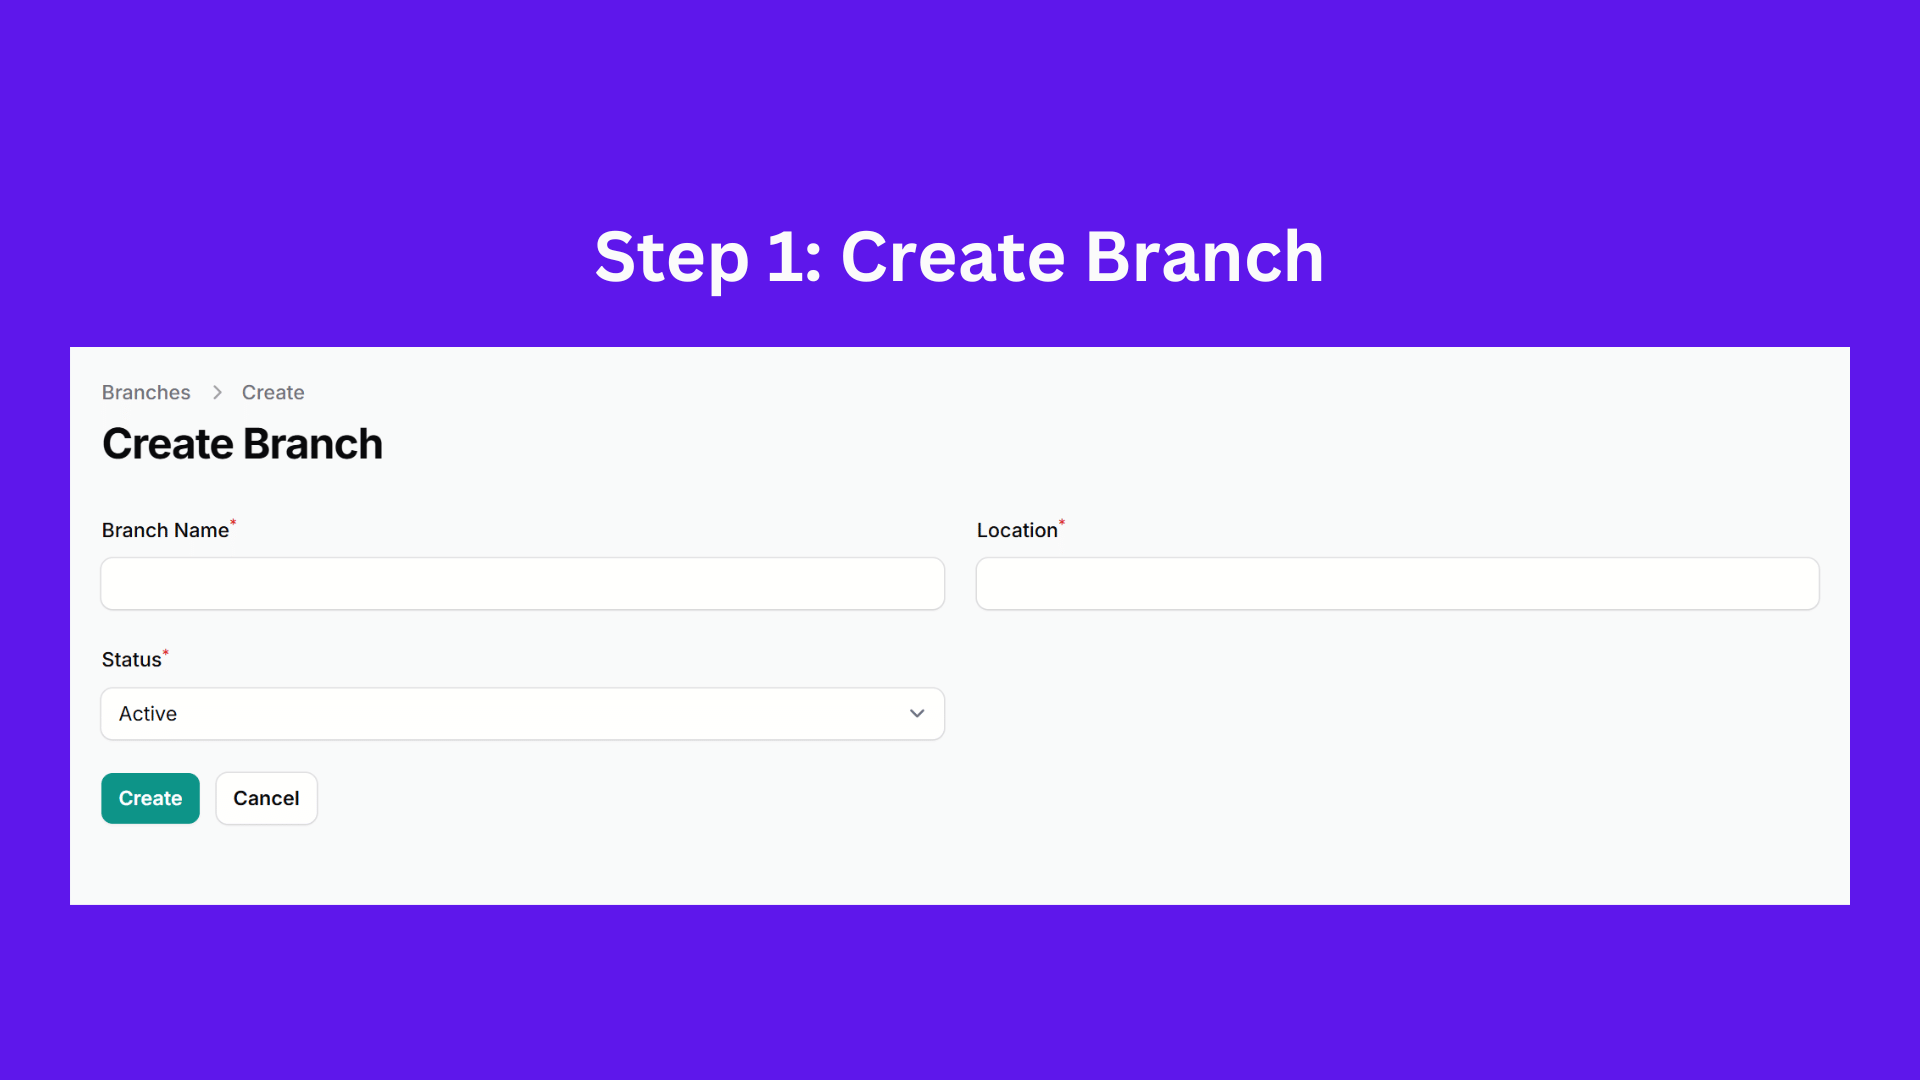
Step 1: Organize Your Locations with Branches
Before you start displaying content, it's a good practice to organize your screens by physical locations or departments using Branches.
- How to do it: Navigate to the "Branches" section in your SignageFlow dashboard. Click "Create New Branch." You'll define the broader Location (e.g., "India," "New York City," "Kerala") and then specify the Branch Name as a particular place within that location (e.g., "Kochi Office," "Times Square Store," "Headquarters Building 1").
- Why it's important: Branches provide a clear hierarchical structure, making it easy to manage screens across different geographical sites and specific venues within them.
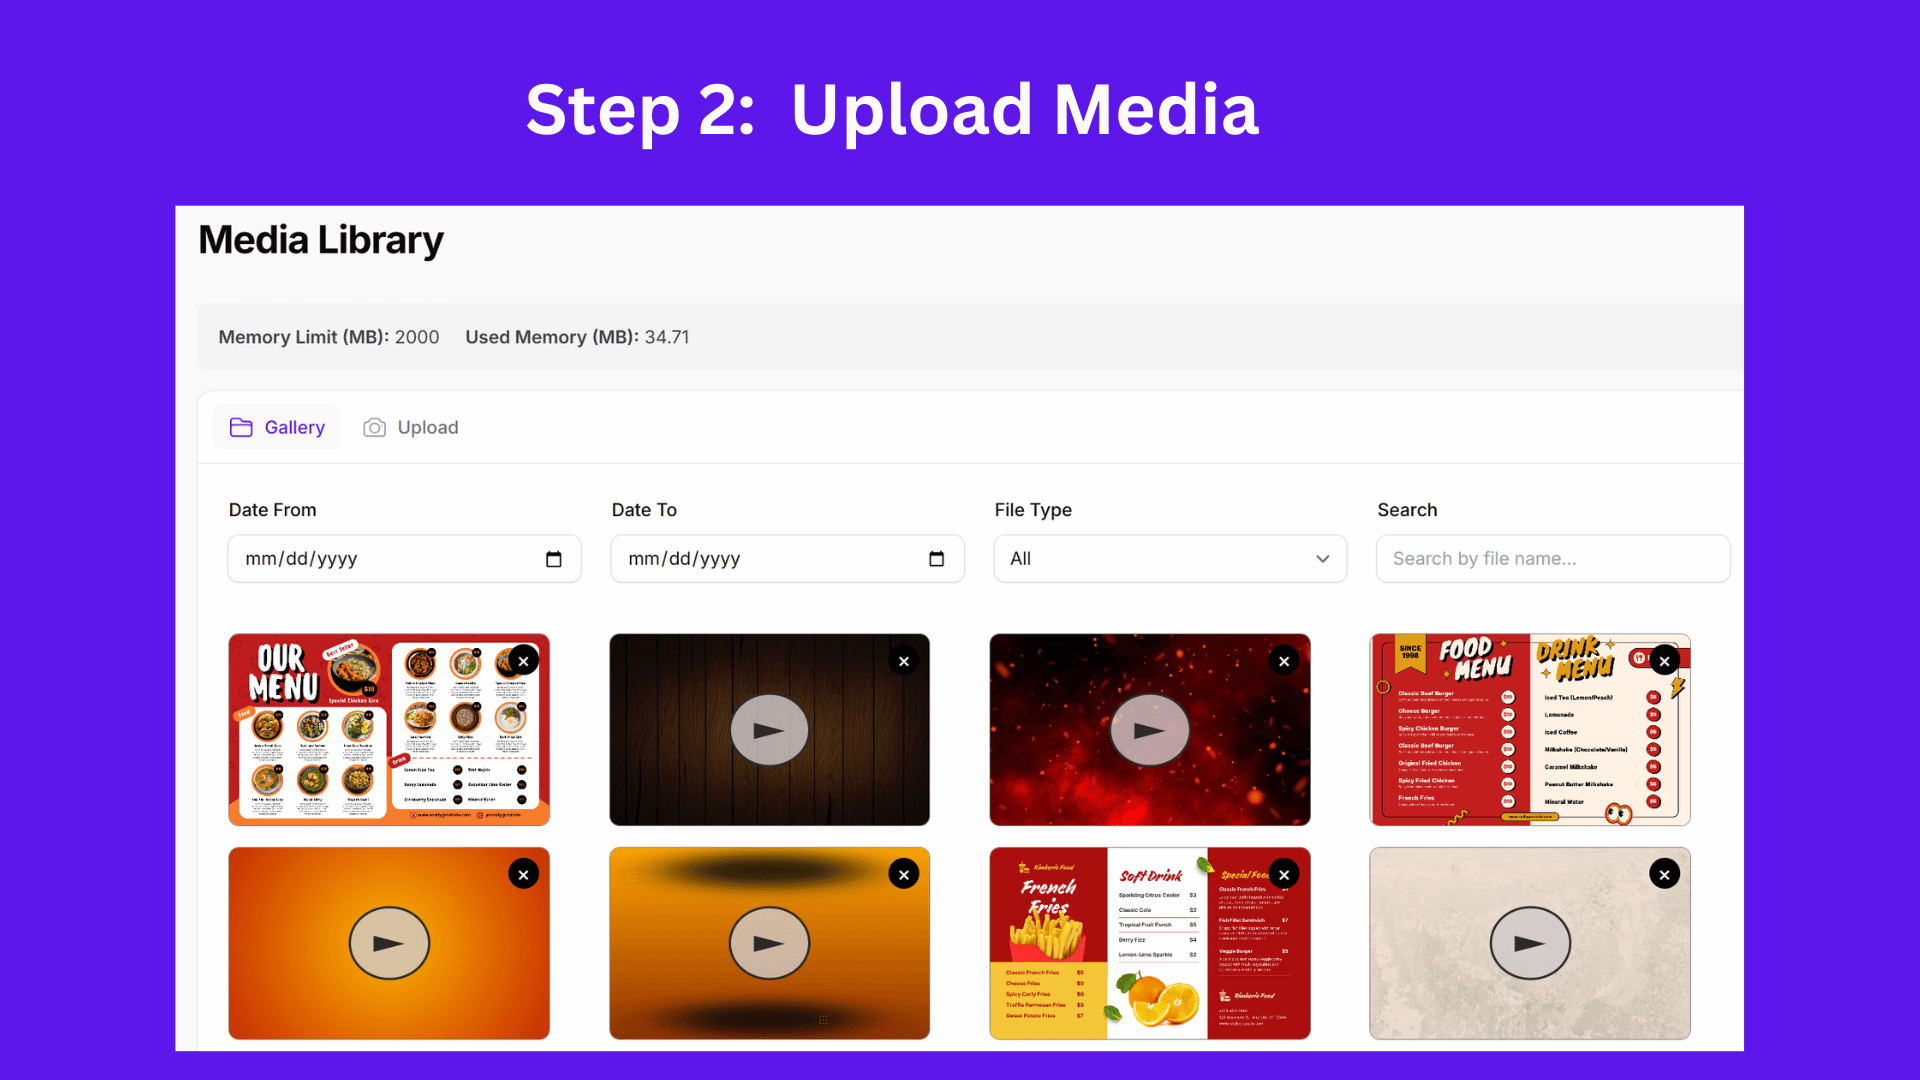
Step 2: Upload Your Content to the Media Library
Your digital signage is only as good as its content! This step covers bringing your images, videos, and other media into SignageFlow.
- How to do it: Go to the "Media Library." You can easily drag and drop your media files directly into the upload area or click to browse your computer. SignageFlow supports various file types. Important: When linking a screen, only media files matching its orientation (e.g., vertical images for a portrait screen) will be available in the playlist selection. This ensures your content always looks great on the intended display.
- Why it's important: A well-organized media library with appropriately sized media ensures you always have the right content ready for your playlists and avoids display issues.
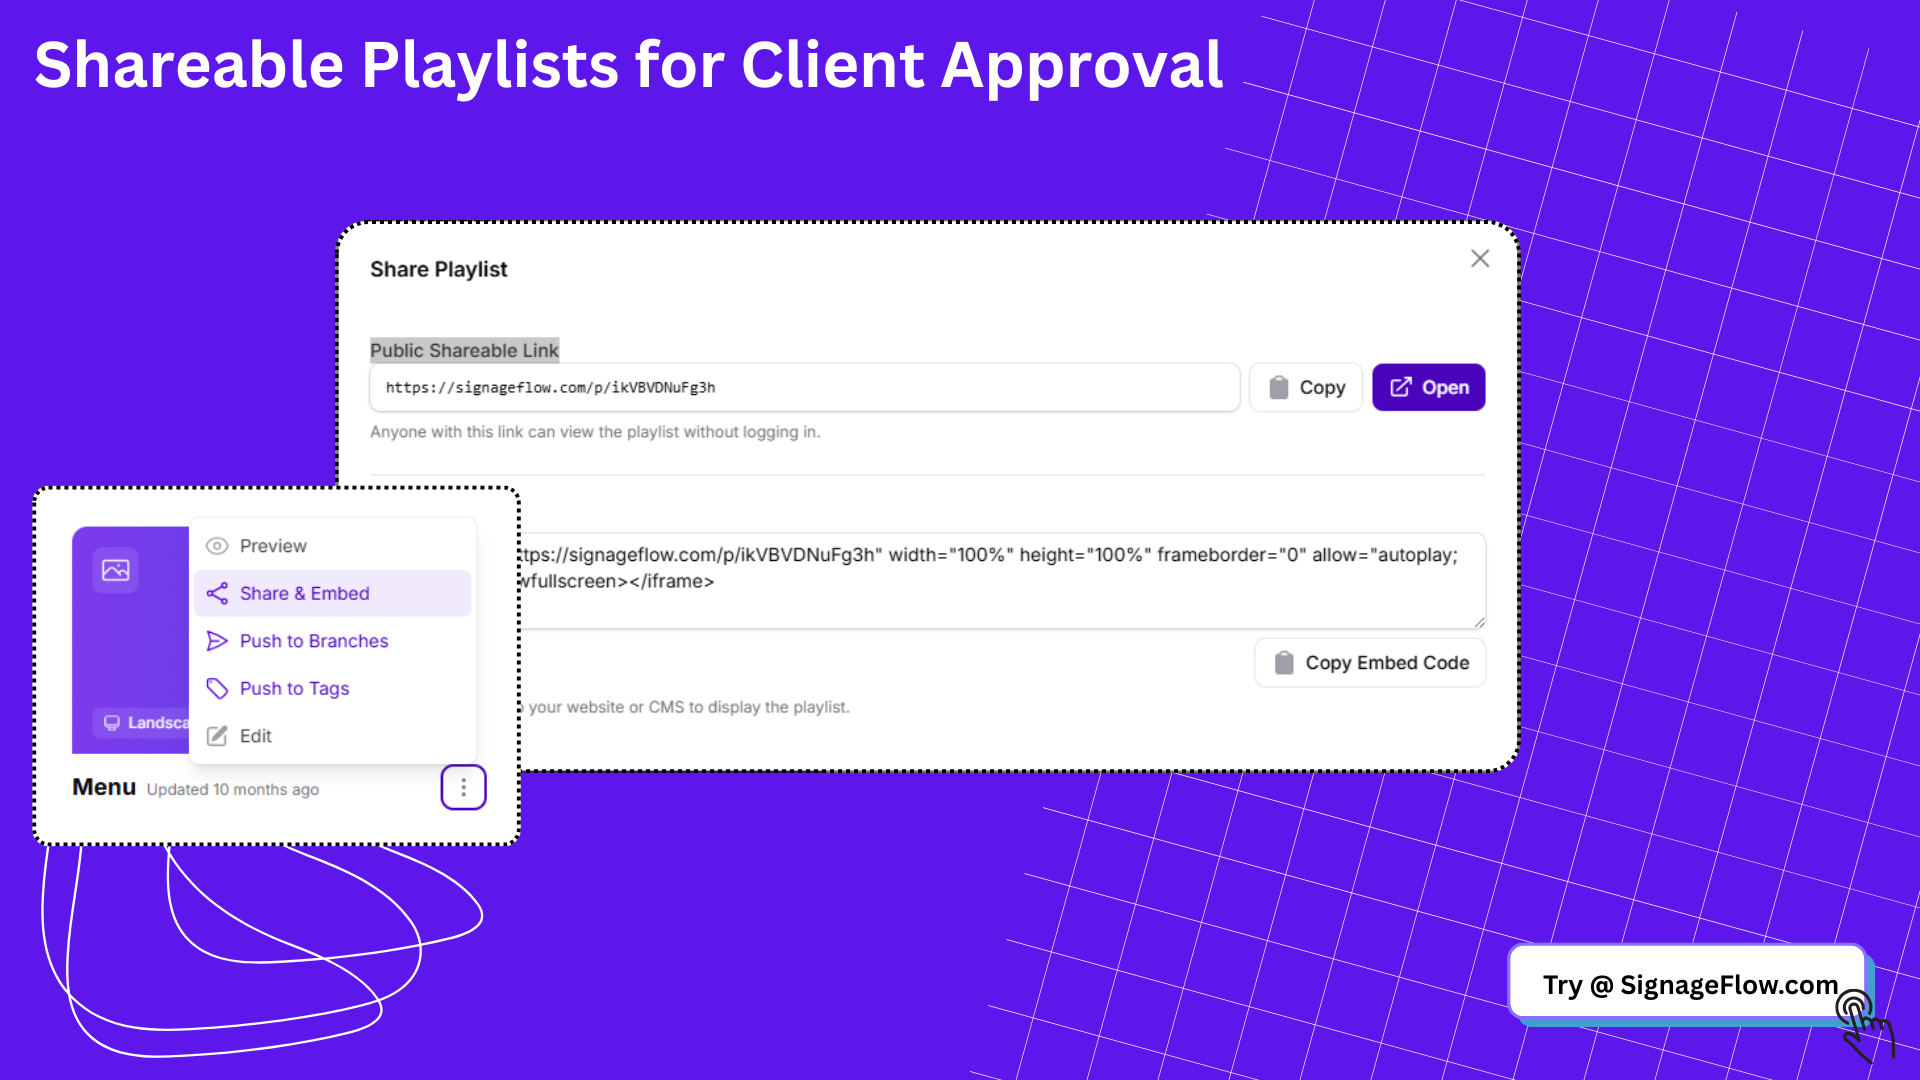
Step 3: Create and Manage Your Playlists
Playlists are the sequences of content that will play on your screens.
- How to do it: Navigate to the "Playlists" section. Click "Create New Playlist" or select an existing one to edit. From your Media Library, simply drag the desired media files into the playlist editor. You can arrange the order, set playback durations for each item, and even set an end date and time for specific items. Once the end date passes, the item will be automatically archived, keeping your active playlists clean. Don't worry, you can always unarchive it later!
- Why it's important: Playlists allow you to schedule a dynamic flow of information, advertisements, or entertainment. The archiving feature is particularly useful for season-specific campaigns (like Christmas sales) that you want to automatically remove after their run without manual intervention.

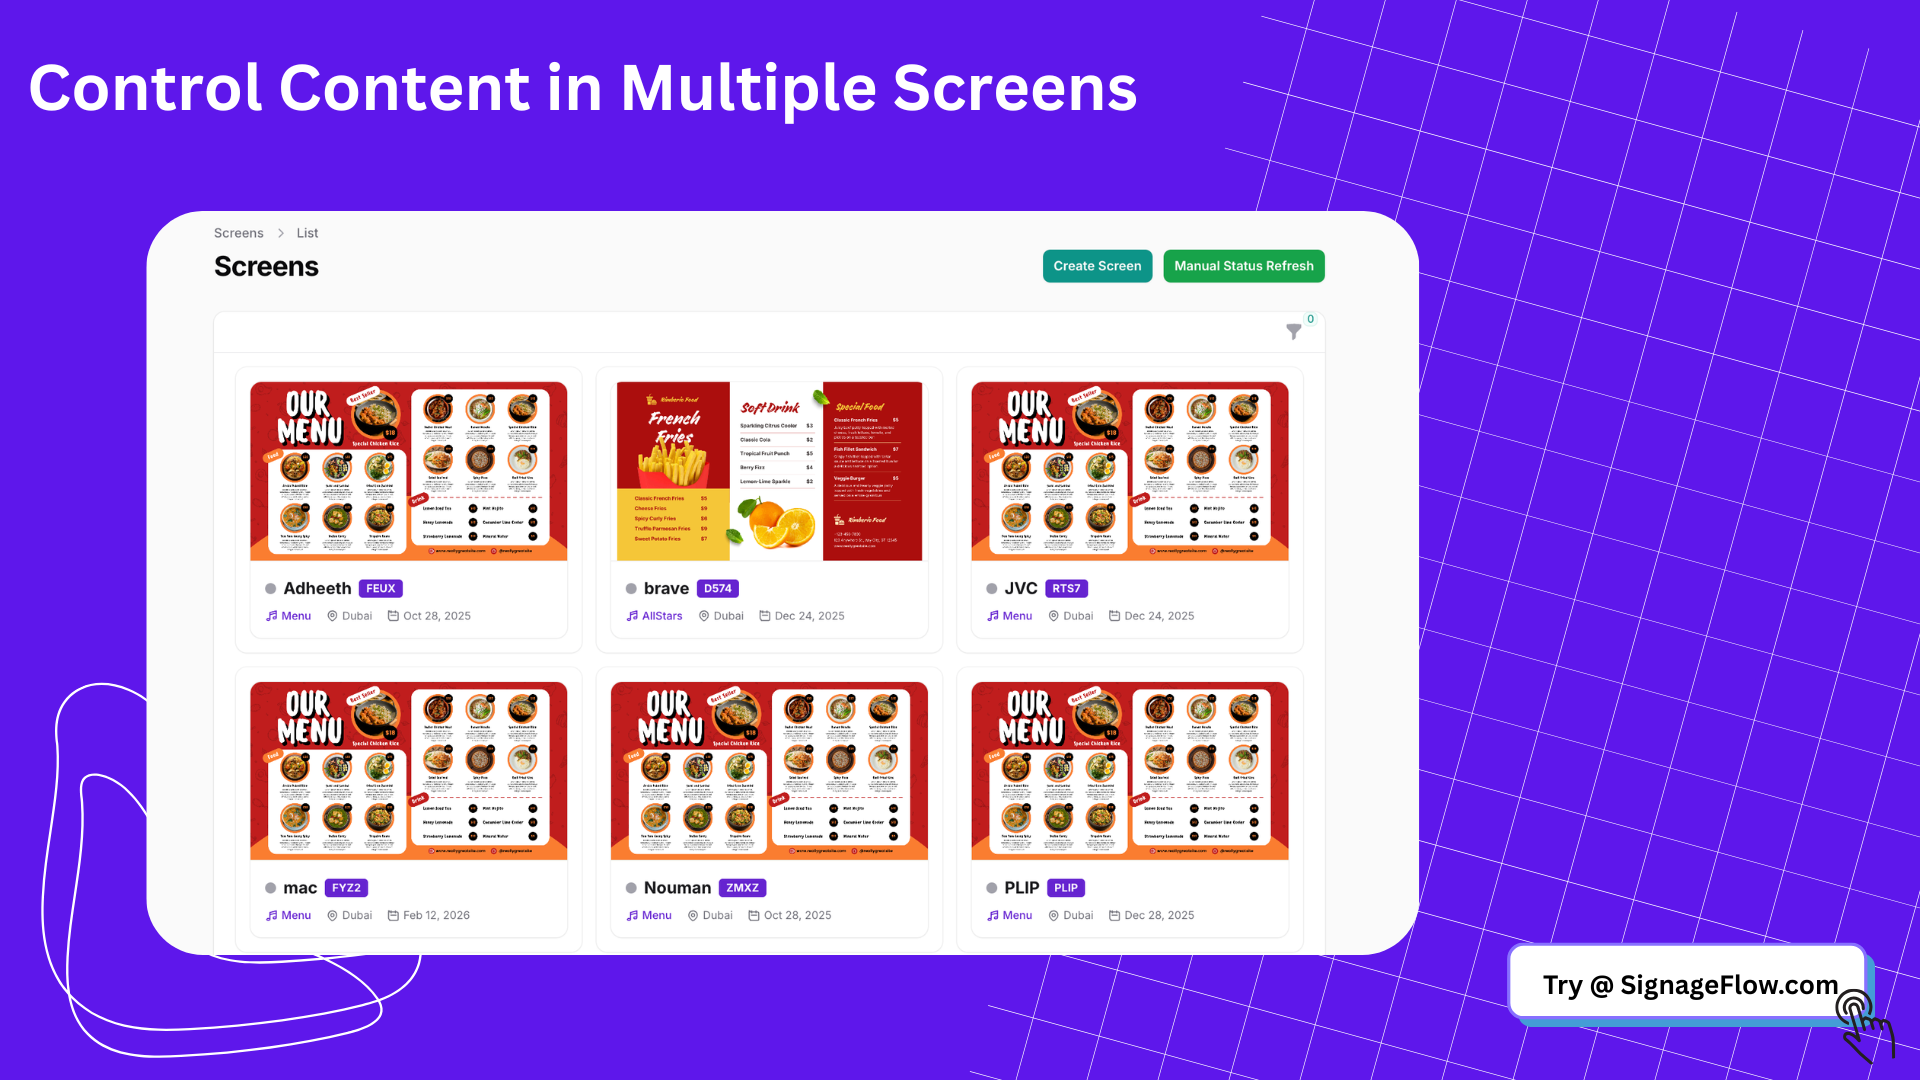
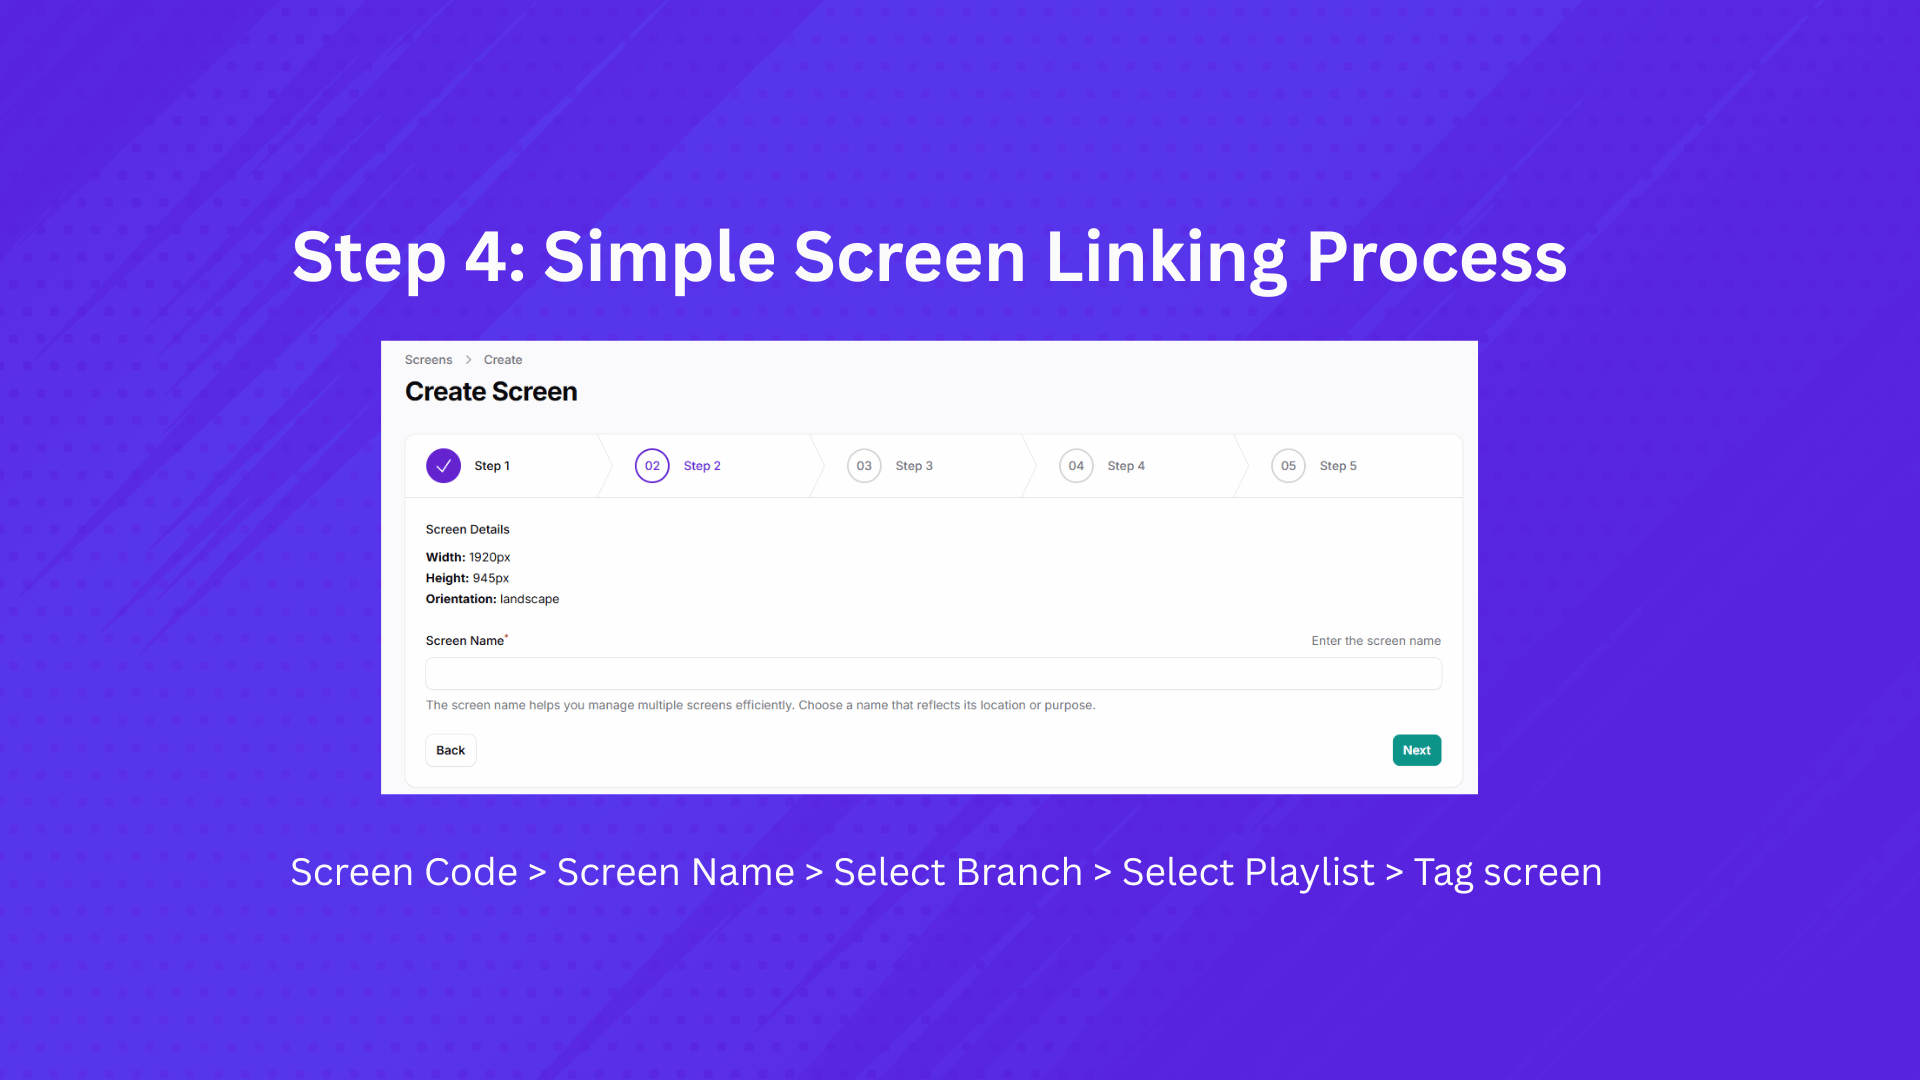
Step 4: Register and Link Your Screens
Now it's time to connect your physical displays to SignageFlow and assign them content.
- How to do it: On your screen device (e.g., smart TV, media player), open the SignageFlow app. It will display a unique registration code. In your SignageFlow dashboard, go to "Screens," click "Register New Screen," and enter this code. Then, name your screen (e.g., "Lobby Welcome Screen") and assign it to a Branch and Group (if you've created any). Linking a playlist at this stage is optional; you can always add or change the assigned playlist later.
- Why it's important: This is the final step to making your content live on your chosen displays, with the flexibility to update content whenever needed.
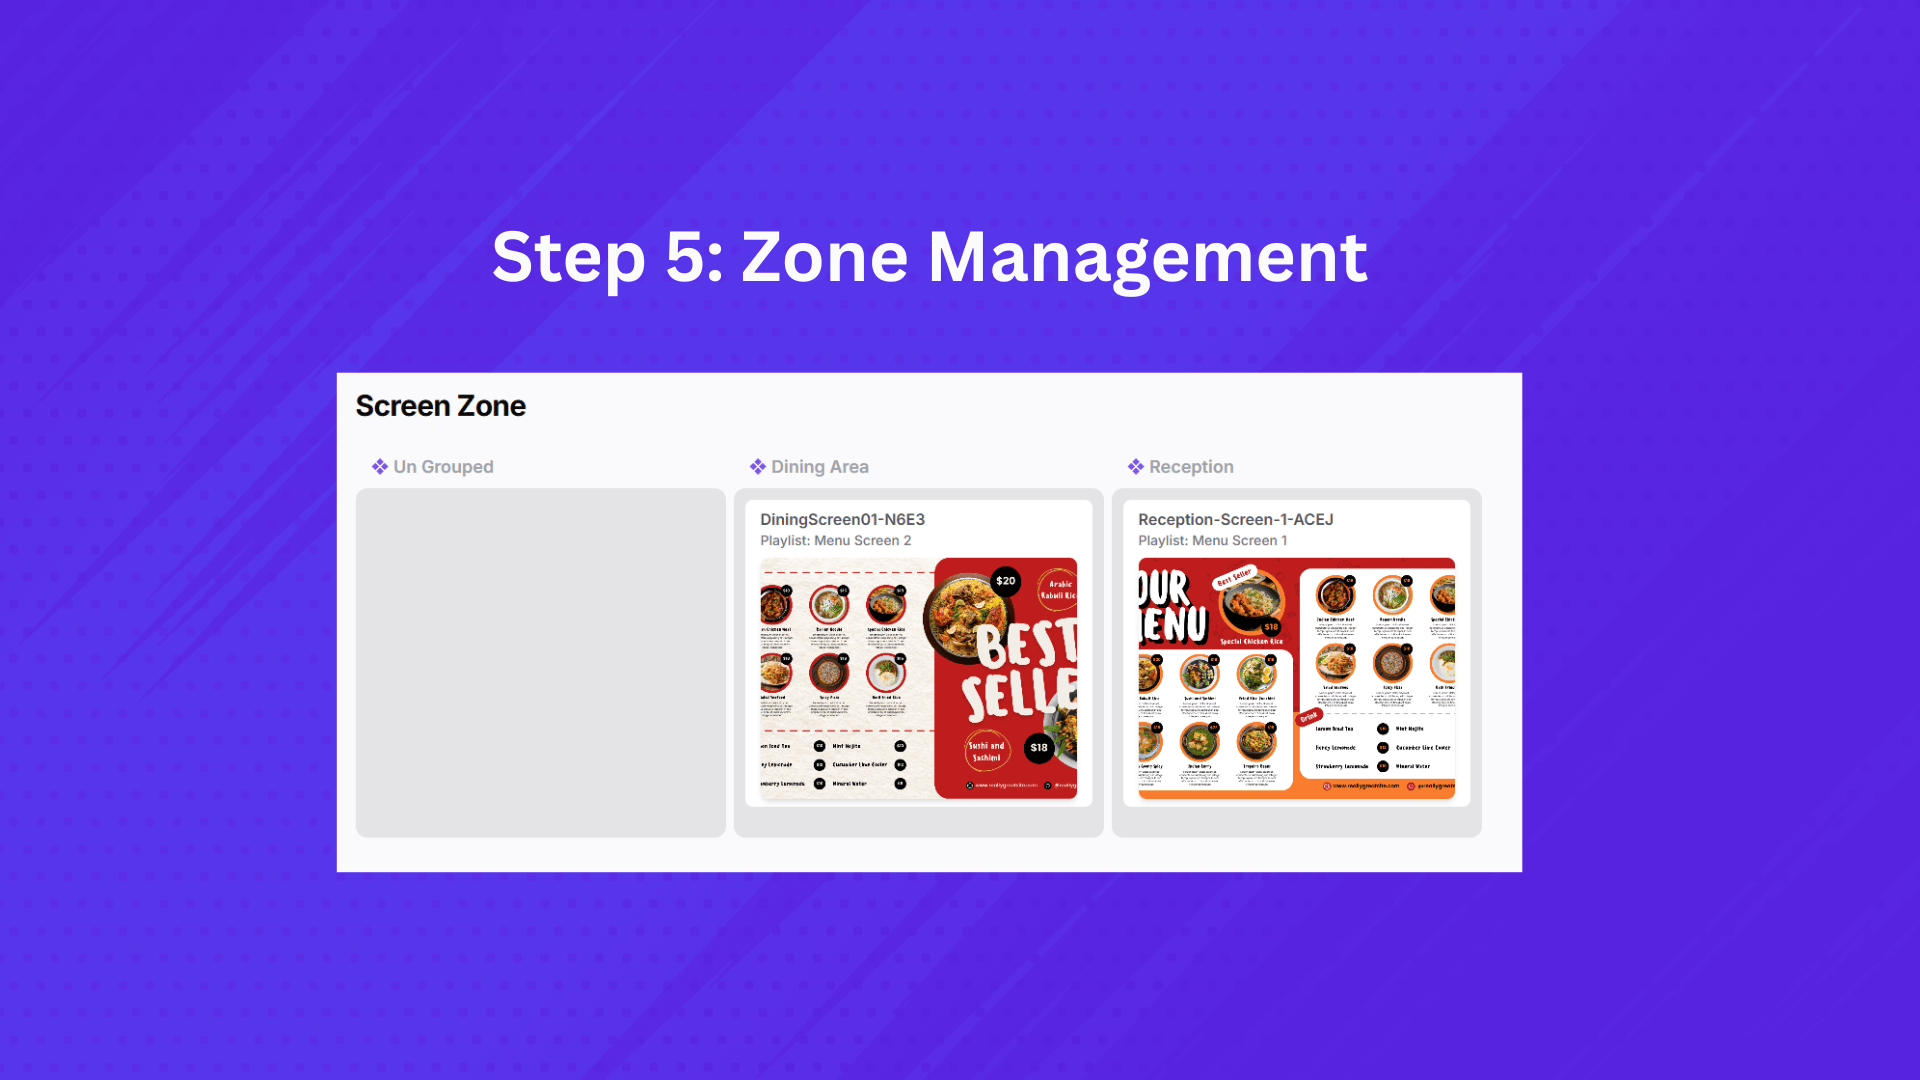
Step 5: Enhance Management with Screen Zones (Optional)
For more complex layouts, Screen Zones allow you to assign specific screens or groups of screens to functional areas.
- How to do it: While configuring your screens, you can assign them to logical "zones" based on their location or purpose within a branch. For example, you might create zones like "Reception Area," "Dining Area," "Waiting Room," or "Product Display Aisle."
- Why it's important: Zones help you quickly categorize and manage screens based on their physical placement or the type of content they should display, simplifying content targeting.
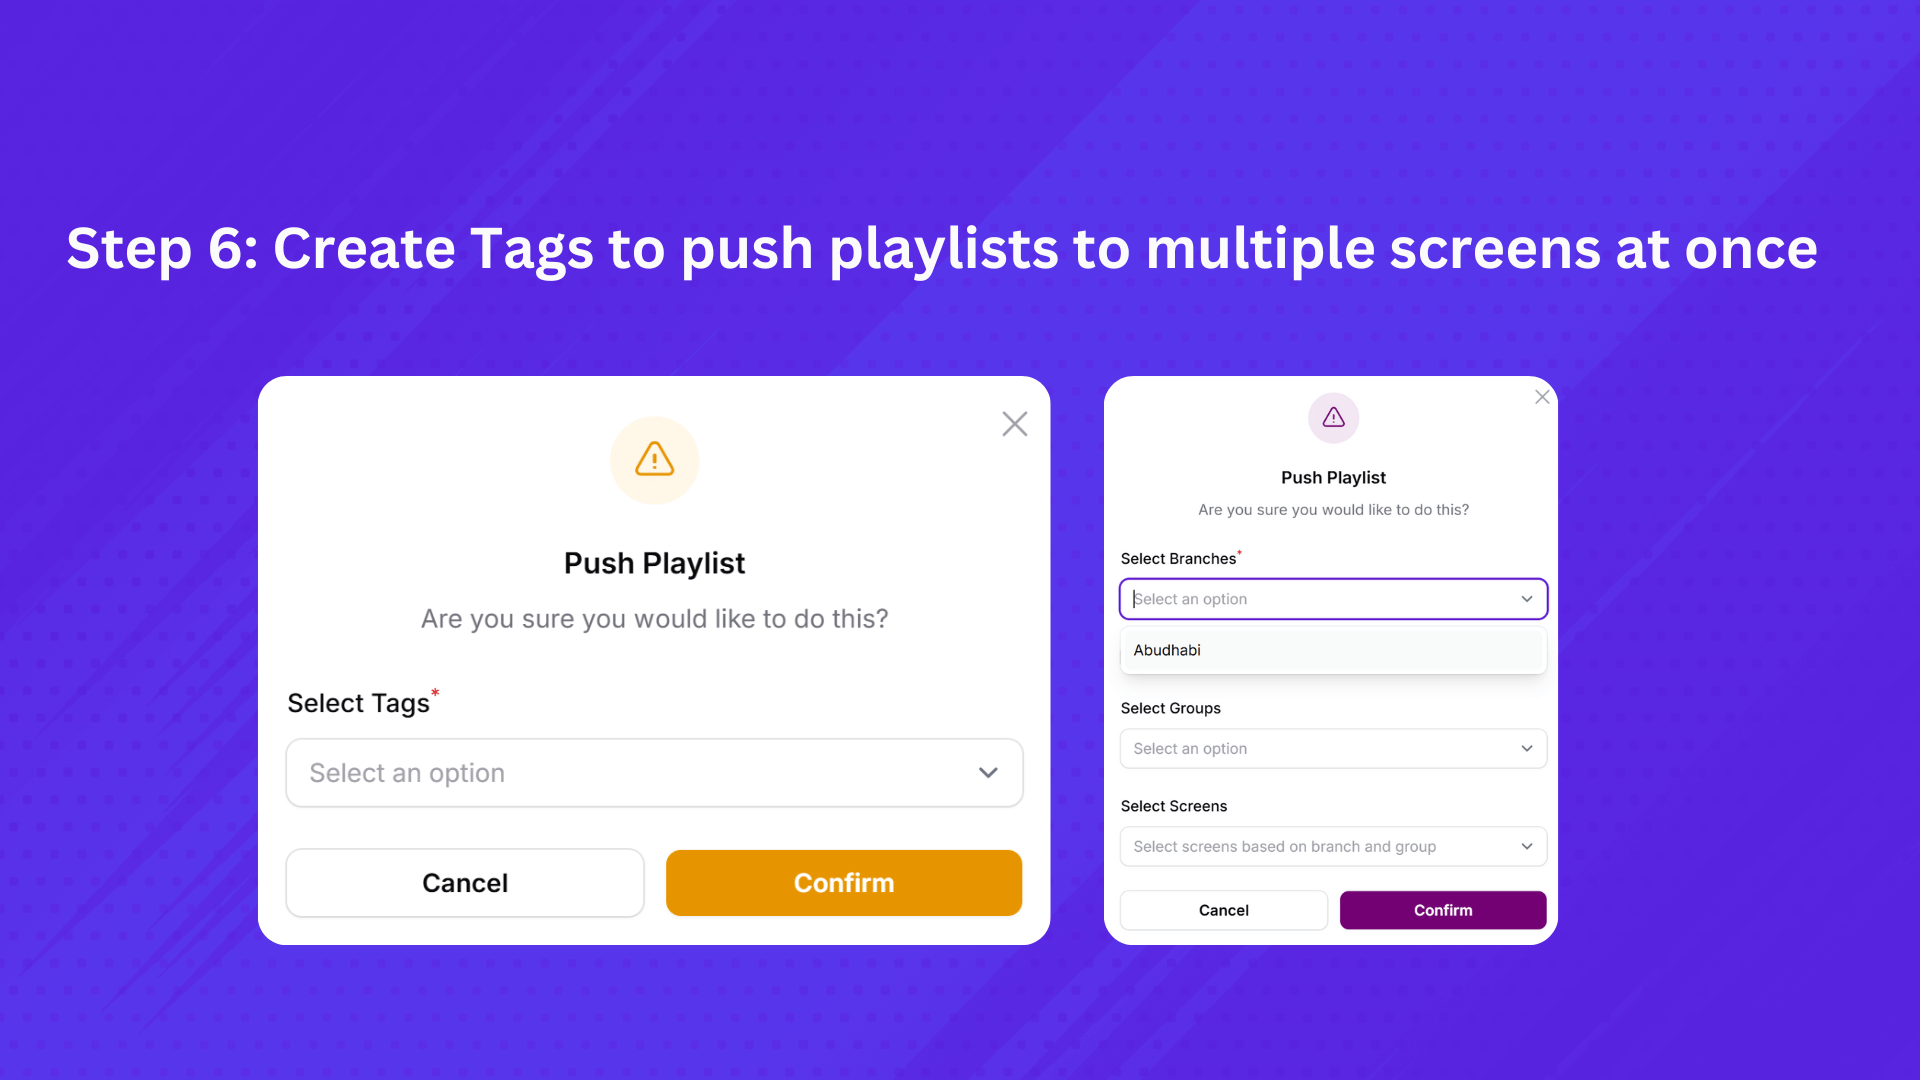
Step 6: Use Tags for Easy Organization (Optional)
Tags are a powerful tool for flexible organization and targeted content delivery, especially as your network grows.
- How to do it: You can apply tags to media, playlists, and especially to screens. For screens, tags help you uniquely identify them, even within the same zone. For example, if you have three screens in the "Reception Area" zone, you could tag them "receptionScreen1," "receptionScreen2," and "receptionScreen3."
- Why it's important: When you have hundreds of screens across multiple outlets, tags allow you to easily identify and push specific playlists to a handful of screens (e.g., changing content for "receptionScreen1" across all branches) without affecting others, making content updates incredibly efficient.
Conclusion:
By following these steps, you'll be able to efficiently set up and manage a dynamic digital signage network with SignageFlow. From basic content display to advanced organization with zones and tags, SignageFlow provides the tools to effectively communicate with your audience. Start exploring these features today and transform your digital displays!